One point perspective drawing creates depth by directing one set of parallel, receding edges toward a single vanishing point. In a simple room viewed straight toward its back wall, vertical edges stay vertical and front-facing horizontal edges stay horizontal. Only the edges running into depth converge toward that point.
You can learn the method with a pencil, ruler, eraser, and plain paper. This lesson builds an original room exercise, adds a door and window, and gives you a way to check confusing lines before shading. The goal is a coherent construction you understand, rather than a heavily decorated picture with uncertain geometry.
Key Takeaways
- Choose a straight-on room view for this first exercise.
- Place the horizon at the viewer’s eye level and keep one vanishing point for the aligned room.
- Classify each edge as vertical, front-facing horizontal, or receding before drawing it.
- Check the room shell and openings before darkening lines or adding shading.
When is one-point perspective the right starting method?
Imagine looking straight down a corridor or directly toward a rectangular room’s far wall. One principal set of room edges runs away from you while the far wall faces you. This is a useful starting arrangement for one-point perspective.
Student Art Guide’s perspective lesson distinguishes a front-on view from a view with a corner facing the viewer, where two-point perspective is often more suitable. Do not force every view of a building into one method.
For this exercise, keep the room’s walls and openings aligned with the same rectangular structure. Rotating a box or piece of furniture introduces a different orientation, which complicates the construction. Learn the shared directions first and add rotated objects in a later study.
If your lines feel stiff, that is acceptable at this stage. The construction is a tool for understanding space. You can later use the same knowledge in a looser observational sketch rather than keeping a ruler in every finished drawing.
Where do the horizon line and vanishing point go?
The horizon line represents eye level in this level-view exercise. It is not automatically the bottom of the sky, the center of the paper, or the top of the far wall. In an interior, you may not see a physical horizon at all.
Matt Fussell’s lesson at The Virtual Instructor explains the horizon and vanishing point as parts of the underlying structure. Mark them lightly even if neither will remain visible in the finished picture.
Draw a small back-wall rectangle and put a light horizontal line through it. Place the vanishing point on that line, inside the rectangle for this first straight-ahead exercise. It does not have to occupy the exact center of the entire sheet.
Choose the viewpoint before adding objects. Moving the eye-level line halfway through the drawing changes the implied view while leaving earlier construction behind. If you want to compare a lower viewpoint, make a second small sketch rather than quietly changing the first.
How do you construct the empty room step by step?
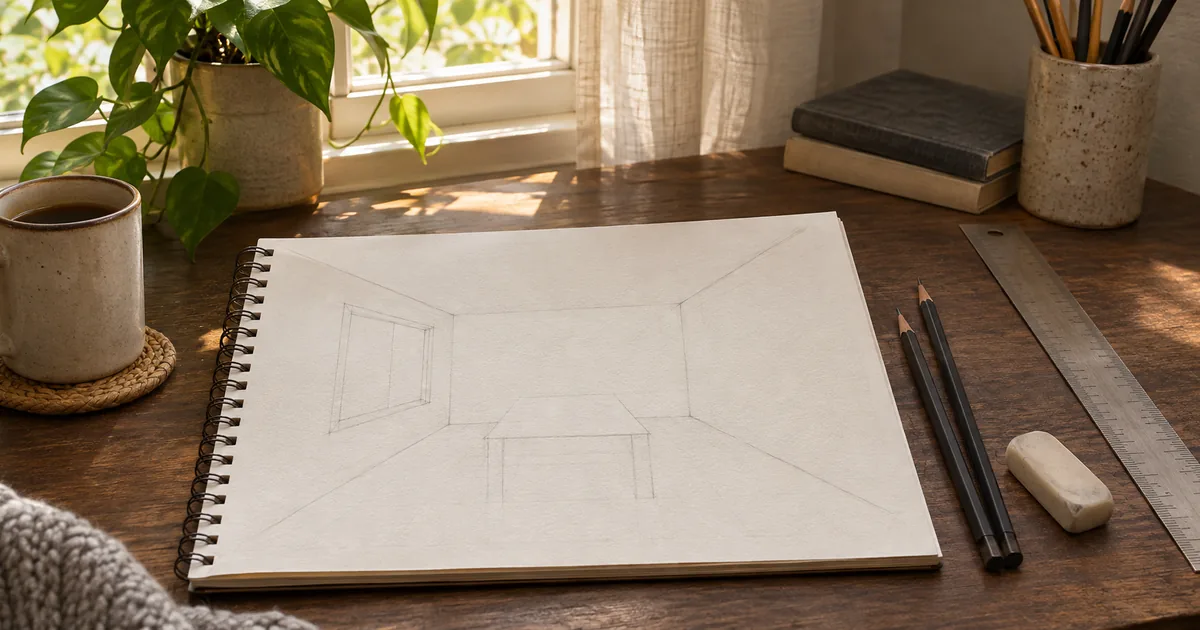
Use this original exercise as a flexible layout, not a measured architectural drawing. Draw a back-wall rectangle approximately twelve centimeters wide and eight centimeters high. Leave enough blank paper around it for the nearer walls, floor, and ceiling to extend outward.
- Draw the back wall with horizontal top and bottom edges and vertical sides.
- Place a light eye-level line about three centimeters above its bottom edge.
- Mark one vanishing point on that line inside the rectangle.
- Align the ruler with the point and each of the four back-wall corners.
- Extend each corner line outward, away from the point, to form the room’s visible boundaries.
- Keep the portion inside the back-wall rectangle free of unnecessary dark lines.
You should now see the far wall surrounded by a floor, ceiling, and two side walls. The receding boundary lines would meet at the vanishing point if continued inward. The rectangle itself remains front-facing.
Pause here. The rectangle can feel too small or the viewpoint too low without any geometric rule being broken. Make a second thumbnail to compare composition if needed. Correcting the shell now is easier than correcting a room already filled with detailed furniture.
How can you add a window and a side-wall door?
Use the back wall for a straightforward opening
Draw a small rectangular window on the back wall. Because that wall faces you, the window’s main edges remain horizontal and vertical. A simple cross-shaped division can follow the same directions. Leave the recess and frame thickness out of this first version.
This gives you a useful contrast: the room has depth, but that does not mean every line on every surface slopes toward the vanishing point. The front-facing window is an immediate check of that distinction.
Follow the side wall’s direction for the door
Choose a point along the left wall’s floor boundary for the nearer bottom corner of a door. Draw a vertical upward from it to choose the nearer door height. From the top and bottom of that vertical, draw light guides toward the vanishing point.
Place a second vertical farther along the wall, between those two guides. It becomes the door’s farther edge. The top and bottom recede; both side edges remain vertical. Keep the whole opening within the visible side wall rather than allowing it to cross onto the back wall.
The result should be a door that belongs to the side wall, not a front-facing rectangle pasted onto a sloping surface. Check it by extending the two receding guides: both should return to the original point. This is the exercise’s main decision and correction, not a reason to add another vanishing point.
Why does a room sometimes look twisted even with a vanishing point?
A marked point does not help if the edges that should use it quietly miss it. Check direction before judging how attractive the drawing looks. Use a spare sheet of paper to extend a line mentally or with a ruler without covering the work in dark corrections.
| Edge in this aligned-room exercise | Direction to check | Common mistake |
|---|---|---|
| Back-wall window sill | Horizontal | Tilting it toward the vanishing point |
| Side-wall door sides | Vertical | Leaning them with the top edge |
| Side-wall door top | Toward the vanishing point | Drawing it parallel to the paper’s top edge |
| Room wall-floor boundaries | Toward the same vanishing point | Using slightly different targets |
A second common problem is applying the rule too broadly. A diagonal decoration, a sloping roof, or a rotated object does not automatically use the room’s one receding direction. Keep those complications out of the first exercise so the check remains meaningful.
Avoid equally spacing cross-lines on the page and assuming they represent equal floor tiles into depth. Perspective spacing needs its own construction. Leave the floor plain for now; a convincing empty room is more useful than a grid that introduces a new error.
How should you finish the drawing and choose the next exercise?
Once the shell, door, and window agree, strengthen only the visible edges you want to keep. Use lighter pressure for remaining construction and lift unwanted guides carefully. If the paper is already deeply scored, accept the study and make the next attempt lighter.
Choose one simple lighting idea before shading. Tone should explain surfaces, not conceal a crooked opening. Our pencil shading exercises can help you practice value separately when construction already demands most of your attention.
Keep the study in your sketchbook with a short note: ‘The side door’s top must recede; its sides stay vertical.’ That is a more useful record than describing the page as good or bad.
For your next version, change one decision: move the eye level or shift the vanishing point within the back wall. Compare the visible floor and ceiling, then repeat the line audit. Become a Pro Pencil Drawing Artist is a related catalog resource if you want to connect perspective practice with a broader drawing routine.
Conclusion
Draw the room shell, one back-wall window, and one side-wall door. Before shading, label the directions privately in your mind: vertical, horizontal, or receding. Fix one inconsistent edge, then repeat the exercise with a different eye level. That comparison turns the method into something you can use deliberately.
Frequently Asked Questions
Does a drawing with one vanishing point mean every object must face the same way?
No. A real scene can contain differently oriented objects, but those orientations may require additional perspective constructions. This beginner exercise deliberately keeps the room and its openings aligned. Establish that structure first; treat a rotated table or tilted object as a separate learning step rather than forcing all its edges to the original point.
Can I practice digitally instead of with a pencil?
Yes. Use a drawing app that lets you place straight guides, keep construction light, and revise without losing the original arrangement. The important work is still classifying directions and checking the viewpoint. Avoid relying entirely on an automatic grid before you can explain why a particular edge follows it.