If your acrylic paint is drying too fast, identify where it is losing workability before adding anything: on the palette, on an absorbent surface, or in a thin layer you keep brushing after it has started to set. Then change the relevant condition, such as direct airflow, exposed paint area, or the size of the section you are blending.
An acrylic painting does not need to stay wet indefinitely. It needs enough working time for your next action. This guide uses an original three-pass blending exercise to help you choose a practical adjustment without buying several products or trying to revive a partly formed film with more water.
Key Takeaways
- Separate a palette problem from a surface or timing problem.
- Move away from direct drying airflow while retaining appropriate ventilation.
- Use slow-drying products according to their own directions; additives and mediums are not interchangeable.
- If a layer starts to grab, stop and choose a dry-layer correction instead of repeatedly scrubbing it.
Where is the paint drying too fast?
Look at the first place the process becomes difficult. If the paint pile has a skin before you load the brush, start with palette management. If fresh paint spreads normally but quickly drags on the canvas, investigate the surface and your working area.
If the brush initially blends smoothly and only begins lifting or roughening the paint after repeated passes, you may be trying to continue beyond the useful blending window. That is a different problem from a completely dry palette.
| What you observe | First question | Useful starting response |
|---|---|---|
| Skin on the paint pile. | How much paint is exposed while you work? | Dispense manageable amounts and protect unused paint appropriately. |
| Fresh paint drags quickly on the support. | Is the surface absorbent or the film very thin? | Test the support and reduce the area worked at once. |
| A smooth patch becomes rough after repeated brushing. | Has the layer started setting? | Stop manipulating it and plan a later correction. |
| Drying is worse near a heater or strong draft. | What is directly reaching the work? | Change the position before changing the paint. |
Golden’s technical notes distinguish a surface skin from thorough drying through the film. Touch-dry paint is not automatically ready for every later process. For this exercise, focus on the earlier question: is the paint still workable for blending?
What should you change in the setup first?
Start with the conditions that require no new material. Avoid direct sun on the palette, a heater aimed at the work, or a strong stream of air across the canvas. Golden identifies temperature, humidity, and airflow as factors affecting drying.
This does not mean shutting yourself in an unventilated room. Keep suitable ventilation and follow the paint’s safety instructions; redirect the work away from a concentrated drying draft rather than sacrificing basic studio conditions.
Lay out the colors and tools before applying the first stroke. Searching for a clean brush halfway through a broad sky uses the time you wanted for blending. A short preparation step can be more useful than slowing the entire paint system.
Choose a smaller study if the technique is new. A hand-sized gradient asks less of your timing than a full-width sky on a large canvas. You can learn the movement first and expand the area when your process supports it.
How can the palette and surface change the result?
Keep a reserve of the colors you need rather than spreading every mixture into a thin film across a large palette. Take a small working amount from the reserve. Use a suitable covered palette system for interruptions, following its instructions and keeping it clean.
A stay-wet palette can help manage paint on the palette, but it is not a guarantee that a thin stroke on the canvas will remain blendable for the same period. Treat those as two locations with different conditions.
The support also matters. Absorbent paper and prepared canvas can behave differently with the same paint. Test on the actual support you intend to use, and follow the preparation guidance for that material.
Our four-color acrylic study keeps color decisions small. Pairing a limited set of mixtures with a modest painting area gives you fewer things to manage while you investigate working time.
Do not change the paper, brush, paint brand, and medium simultaneously, then conclude that one particular change solved the problem. A small, readable comparison is more useful than a dramatic but confusing improvement.
When should you use a slow-drying product?
Consider a compatible slow-drying medium or additive when your setup is reasonable but the intended effect still needs more working time. Read the product’s mixing instructions and test it on a spare piece of the same support.
Liquitex’s FAQ recommends reviewing heat and airflow and describes products for extending workability. It also warns against combining multiple additives in one mix. More product is not automatically a better solution.
Winsor & Newton’s working-time guide distinguishes slow-drying mediums from a fluid retarder with minimal acrylic resin. That distinction matters: a retarder is not simply an extra supply of binder, so do not substitute it freely for the paint or a general medium.
Use the quantity and combination specified for the exact product. Do not copy a percentage from a different manufacturer or assume a few unmeasured additions are harmless. Keep the label available while testing.
Adding more water changes the mixture, but it does not reliably solve every fast-drying problem. Avoid household substitutes and improvised mixtures. If the product directions are unclear, ask the manufacturer rather than experimenting on a finished painting.
What does a three-pass blending test reveal?
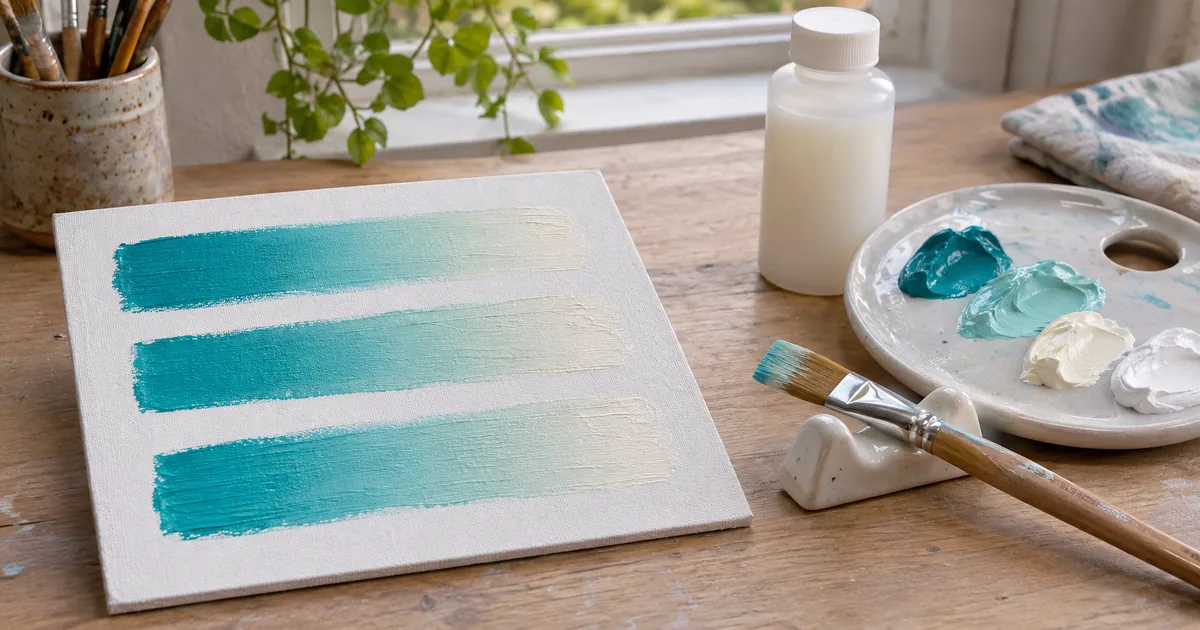
This original example is a hypothetical practice record, not a measured product comparison. Use the same colors, prepared support, brush, and fresh paint for each pass. Aim for a simple light-to-dark strip; keep the process short enough to observe.
Pass one: establish the problem
A learner paints a broad strip near a fan. The first half blends, but the second becomes resistant while the learner is still working. The record says “direct airflow; broad area; later strokes drag,” rather than “this paint is bad.”
Pass two: change the direct airflow
The learner moves the work away from the fan’s concentrated stream while retaining room ventilation. Fresh paint and a similar strip produce a more manageable first blend, but the far edge still starts setting before the learner finishes.
That hypothetical outcome suggests the direct draft contributed, but does not prove it was the only cause. Keep the second setup for the next comparison instead of adding several products at once.
Pass three: reduce the area
In the same second location, the learner paints a shorter strip and completes the transition without returning repeatedly to the first section. The expected practical result is a smaller area that can be finished within the available working time.
The decision is to divide the next study into manageable areas before buying a retarder. If a small area still fails under reasonable conditions, test a suitable product as a separate comparison. Your own record may lead to a different choice; that is why the observations matter.
What should you do when the layer has already started to set?
Stop when continued brushing creates ridges, lifts patches, or makes the surface rougher. Leave the area alone and follow the paint system’s drying guidance before making the next planned application.
Once suitable for further painting, you can rebuild the passage with fresh paint, use a deliberate opaque edge, or choose a transparent layering approach with an appropriate medium. Each is a different technique from trying to keep the original wet blend alive.
- Identify the patch you want to change instead of repainting the whole picture automatically.
- Mix the replacement color before touching the surface.
- Make a small test on spare material if the new application differs from the first.
- Check the dried result before deciding that it needs another pass.
Our beginner acrylic techniques guide compares wet-on-wet and wet-on-dry approaches. Choose the one that fits the current state of the paint. For broader practice, Canvas Painting is a relevant ebook in the catalog.
Conclusion
Try one short blending strip and record where the paint stops cooperating. Change one condition, repeat with fresh paint, and compare the result. Aim for enough working time to finish a deliberate section; do not treat slower drying as the only route to a better painting.
Frequently Asked Questions
Can a covered palette keep acrylic paint usable between sessions?
A suitable palette system may help, but the result depends on its design, the paint, cleanliness, and storage conditions. Follow its instructions and inspect the paint before reuse. Do not assume a lid makes a mixture indefinitely usable or restores paint that has already formed a film.
Does a slow-drying medium mean I can varnish sooner?
No. Extending working time and preparing a painting for varnish are different concerns. Follow the paint, medium, and varnish manufacturers’ drying requirements for the actual application. Surface dryness alone is not a reliable shortcut to readiness.