To use a capo, fit it across the strings just behind the chosen fret, check that every string sounds clearly, and recheck tuning. Play familiar chord shapes relative to the capo. The shape names describe your fingers; the sounding chord names change because the capo raises the pitch.
This beginner guide uses a full-width capo, standard guitar tuning, and a simple original G–C–D loop. It focuses on placement and pitch. Partial capos and alternative tunings need their own instructions because they do not follow every assumption in this example.
Key Takeaways
- Place the capo close behind the fret wire, rather than on top of it.
- Check individual strings before blaming a chord shape.
- Name both the shape and the sounding chord when playing with others.
- A capo raises pitch; finding a comfortable singing key still requires listening.
What does a capo actually change?
A full-width capo presses the strings against a chosen fret, shortening the vibrating length available on the bridge side. It acts like a temporary new starting point for open-position playing. You can use familiar shapes while hearing them at a higher pitch.
D’Addario’s guide explains that each fret raises the pitch by a half step. Two frets raise it by two half steps, also called a whole step. This relationship is the basis of the chord-name comparison later in the guide.
The capo does not teach a new chord shape or repair an unclear one. If you mute a required string with a finger, that problem can remain after adding the capo. First establish that the individual shapes work; our chord-change guide treats a separate movement problem.
Do not confuse a new musical key with an alternative tuning. In this exercise, the guitar begins in standard tuning. The capo raises the available pitches without requiring you to create a different open-string tuning first.
Where should you put the capo on the guitar?
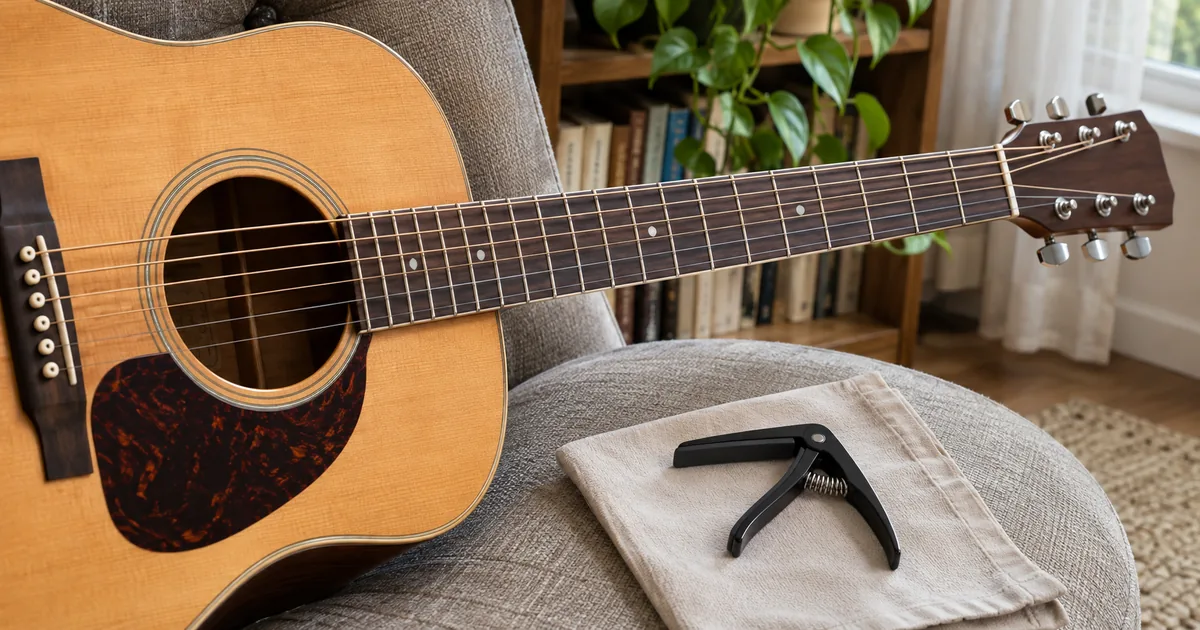
Count from the nut at the headstock end. The first fret space lies between the nut and first metal fret wire. For a capo at fret two, its padded bar sits across the strings in the second fret space, close to the second wire on the nut side.
Gibson’s placement guide recommends a straight position, nearly touching the chosen fret but not sitting on top of it. Keep the pressure bar aligned across the strings rather than pulling some strings sideways.
- Tune the guitar without the capo.
- Open or loosen the capo according to its design.
- Place its padded bar just behind the chosen fret wire.
- Release or tighten gently, checking alignment.
- Pick the strings one at a time and then check their tuning.
If the capo has adjustable tension, use enough for clean contact without unnecessary pressure. The correct fit depends on the device and neck. Follow its instructions rather than forcing a mechanism that does not suit the guitar.
Once fitted, treat the capo as the new reference for familiar shapes. A finger that normally sits one fret beyond the nut now sits one fret beyond the capo. You are moving the relative shape, not leaving your fingers in the original physical frets.
Why are chord shapes different from sounding chord names?
Say “G shape” when you mean the familiar fingering. With the capo at fret two, that shape sounds an A major chord. A piano player or singer discussing the actual key needs the sounding name, not just the shape you see.
| Shape played | No capo: sounding chord | Capo at fret two: sounding chord |
|---|---|---|
| G major | G major | A major |
| C major | C major | D major |
| D major | D major | E major |
| E minor | E minor | F-sharp minor |
The major or minor quality stays the same in this full-capo transposition. E minor becomes F-sharp minor rather than F-sharp major. The relationship between the chords stays the same even though every root is higher.
Yamaha’s discussion of capo use illustrates how moving familiar open shapes changes their key and can change the character of the guitar part. Keep that musical effect separate from the label on a chord diagram.
A chart may list shapes with a capo instruction or list concert-pitch chords with no capo assumption. Read its heading before playing. Otherwise you may transpose a part that has already been written for the intended capo position.
What does a G–C–D example sound like at fret two?
Here is an original practice loop, not a transcription of a song. Use G, C, and D major shapes you already know. Play four comfortable down-strums on each shape, then repeat the three-chord loop. Keep the rhythm simple enough to hear the chord quality.
Make a baseline before adding the capo
Without the capo, play one slow loop and listen to the actual G, C, and D chords. Stop and check any muted required strings. You want the next comparison to show the capo’s effect, rather than a chord you could not yet play clearly.
Fit the capo at fret two and perform the placement and tuning checks. Rebuild the same three shapes relative to this new starting point. The sounding loop is now A, D, and E major, while the shape sequence remains G, C, and D.
Use one fault to make the next decision
Suppose the C shape sounds unclear after fitting the capo. Pick its required strings individually. If an unfretted string already buzzes, inspect capo contact before changing the chord. If the string is clear alone but muted when your hand forms C, check finger placement.
The result is a more precise decision than “the capo makes C difficult.” You have located whether the interruption comes from the device, the setup, or the fretting hand. Once corrected, play the loop again at the same pace.
Finish by saying the two descriptions aloud: “G–C–D shapes, capo two; sounding A–D–E.” That short statement helps you communicate the part to someone playing another instrument.
How do you fix buzzing or sharp notes?
Start by checking placement rather than increasing pressure immediately. A capo too far from the wire may need more force than a neatly placed one. A skewed bar may leave one string poorly seated while pulling another sideways.
| Problem | First check | Next step |
|---|---|---|
| Open string buzzes with capo | Contact, position, and alignment | Refit gently and test again. |
| Notes become noticeably sharp | Sideways pull or excessive pressure | Reseat and reduce adjustable tension where possible. |
| Only a formed chord is muted | Fretting fingers touching required strings | Check the chord without changing capo position. |
| Problem remains after refitting | Capo fit or instrument setup | Ask a teacher or guitar technician to inspect it. |
After a sensible adjustment, recheck tuning. Do not repeatedly retune around a badly placed capo without addressing the placement. Also remember to check again when removing or moving it.
Capos are not identical. Neck width and fingerboard shape vary, and a device appropriate for one instrument may fit another poorly. A persistent problem does not necessarily mean that you need stronger hands or a more expensive accessory.
How can you choose a position for a song or singer?
Begin with the arrangement’s stated position if you are learning from a chart. Check whether the chord names are shapes or sounding chords, then try a short section. When changing position for a singer, listen to the high and low notes of the melody, not only its first phrase.
A capo raises the pitches produced by the same shapes. Moving it higher may help when that arrangement is too low, but it is not a universal way to lower a song. Lower keys may require different shapes, a different arrangement, or removing a capo already in use.
Change one fret at a time and check whether the whole passage feels suitable. Avoid a rule based on someone’s gender or a promised vocal range. The particular singer and melody determine the useful key.
Keep the experiment inside a small practice session. Our beginner guitar routine helps balance technique and playing, while Learn The Guitar is a related catalogue option for broader learning.
Record the chosen position and both chord-name systems. Tomorrow’s starting note should tell you what you meant without requiring you to rediscover the arrangement.
Conclusion
Use a full-width capo at fret two and check the strings before playing the original G–C–D loop. Name the sounding A–D–E chords, then isolate any unclear string before changing speed. Keep the position only if it serves the music you want to play.
Frequently Asked Questions
Can I use a tuner after putting the capo on?
Yes, but use the correct target pitches or a suitable capo mode. With standard tuning and a capo at fret two, the low E string sounds F-sharp. A tuner mode that still insists on an open E target may confuse the check. Consult the tuner’s instructions rather than loosening strings to chase the wrong target.
Does using a capo mean I can skip learning barre chords?
It can make certain arrangements accessible with familiar shapes, but it does not replace every function of a barre chord or every musical choice. Treat it as an arrangement tool. Keep learning the techniques relevant to the songs you want to play, rather than judging the capo as either a shortcut you must avoid or a solution to every difficulty.