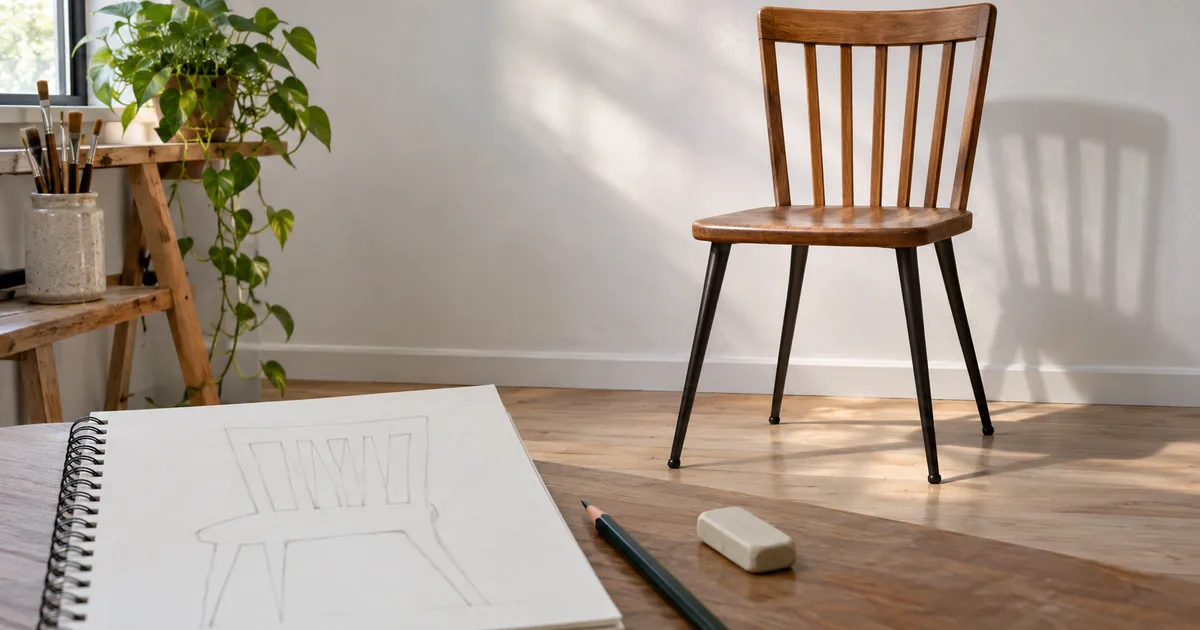
Negative space drawing exercises train you to draw the shapes around and between objects. Start with a chair and outline three visible gaps between its supports. Those gaps share their edges with the chair, so comparing their widths, heights, and angles gives you another way to check the chair’s proportions.
You need a pencil, plain paper, and a subject you can keep in one position. The exercises below move from a chair to a mug and then a pair of objects. The main example follows a gap that has become too narrow and shows how to choose which boundary to correct before shading hides the problem.
Key Takeaways
- Treat each visible gap as a shape with its own corners and proportions.
- Keep your viewpoint steady so the gaps stay consistent.
- Compare one large space before correcting small details.
- Use negative space alongside the object’s overall outline and alignment.
What counts as negative space in a drawing?
A mug is positive space when it is the subject of your drawing. The open shape inside its handle and the area around its outer contour are negative spaces. They can be tiny, enclosed holes or broad regions extending to the edge of the page. Both can help you judge how the subject sits in the picture.
The Whitney Museum’s positive and negative space activity invites learners to identify these surrounding shapes in ordinary objects. Try that before drawing. Look at a chair and name the visible gaps as a tall wedge, a narrow rectangle, or an uneven triangle. Give each shape a description based on what you see from your seat.
A negative space can share a boundary with more than one part of the object. The gap below a chair seat may be bounded by the seat, two legs, and a crossbar. If the gap changes on paper, inspect those four boundaries. You have a short list of possible corrections.
How do you set up a subject that stays still?
Place a simple chair a little to one side against a plain wall. Choose a seat for yourself and keep the paper in a comfortable position. Close the same eye each time you compare close alignments if switching eyes changes the view. A chair seen at a slight angle offers gaps of different widths, which makes comparison useful.
Draw a light rectangle on the page to define your viewing frame. Mark the chair’s highest, lowest, leftmost, and rightmost points inside it. These four anchors give the gaps a place to live. Leave enough room around the chair that you can compare the outer spaces as well as the enclosed ones.
Use a light touch for the first lines. Pick one unit you can recognize, such as the width of the largest gap under the seat. Compare the neighboring spaces with that unit rather than measuring every distance from scratch. Recheck the unit if you move your head or change the chair’s position.
How do you draw three chair gaps?
Start with the largest open shape
Find the largest gap below the seat. Locate its top corners and its lowest point, then join them with straight, light strokes. The shape may have more than three sides. Follow the bends you actually see and leave the chair legs themselves as narrow strips of untouched paper.
Next, outline a smaller gap beside it. Compare how far its top corner sits below the first shape’s top corner and whether its bottom point falls inside or outside that corner’s vertical alignment. These comparisons connect the two spaces. Continue to one opening in the chair back and check how it sits above the seat.
Let the shared edges reveal the chair
Fill the three gap shapes with one even light tone. You can now see the chair emerging between them. The negative space exercise hosted by Brown University uses a chair for this kind of observation. Look for a chair whose overall lean and width resemble your subject before adding another opening or the outside contour.
Use one short pass to check all three spaces against the original. Suppose the back opening is tall and narrow while the gap under the seat is broad and shallow. Keep that contrast visible. Three nearly identical shapes may be a sign that you have simplified away a difference that matters.
How do you correct a gap that looks wrong?
Imagine your drawing’s central gap looks too narrow. On the chair, it appears roughly half as wide as it is tall. On your page, it looks closer to one-third. Those proportions are observations for this hypothetical example. A different chair or viewpoint will have different relationships.
Before widening the gap, compare its top corners with the seat corners. Suppose the left corner aligns well, but the right corner sits too far toward the middle. The right leg’s inner edge is a likely place to adjust. Draw a faint replacement line farther right and compare again, leaving the first line visible until you decide.
| What looks wrong | Comparison to make | Possible adjustment |
|---|---|---|
| Gap is too narrow | Its corners against the seat | Move the misplaced inner boundary |
| Gap is too tall | Seat height against a crossbar | Check the upper or lower boundary |
| Two gaps lean differently | The angle of their shared support | Correct the shared edge once |
| Chair feels squeezed in the frame | Outer margins against chair width | Revisit the overall scale |
After shifting the right boundary, the gap now has the observed width and the leg looks slimmer. Check the outside edge of that leg as well. If both edges moved outward together, you may have displaced the entire leg. One corrected gap should agree with its neighboring shapes and the chair’s outer limits.
Which other exercises build the same skill?
A mug handle for one enclosed space
Set a plain mug against a contrasting background with its handle clearly visible. Draw the hole inside the handle first. Compare the hole’s height with the cup’s height, then add the handle’s outside edge around it. If the hole is too small, making the handle thicker will exaggerate the problem.
Two objects for one shared gap
Place a small bottle beside the mug. Leave a visible sliver of background between them. Sketch that sliver and record where it is widest. Then outline the outer sides of the two objects. This version makes you compare spacing and relative height before labels such as mug or bottle take over.
Try each setup twice, moving only one object between attempts. In the second pair, shift the bottle closer to the mug and predict how the gap will change before drawing it. The comparison gives you a concrete result to look for. RISD Museum’s negative drawing prompt offers another simple way to explore surrounding shapes.
How do you use negative space in a finished picture?
Once the gaps agree, use the main outer contour to finish the chair or still life. Add the interior lines needed to explain the seat, rim, or crossbars. Keep checking the spaces as you add detail. A correction to an inner leg edge changes the neighboring gap, even if the outside silhouette stays the same.
Shade only after the main shapes feel settled. Start with a simple light-and-dark grouping so you can still read the silhouette. If you need more control over tones, these pencil shading exercises give you a separate practice task. You can then return to the chair with one clear shading goal.
The same spacing checks help with larger studies in Become a Pro Pencil Drawing Artist. Use a gap to check an awkward relationship, such as the space between an arm and a torso, then compare the complete figure. Switching between these two views keeps a local correction connected to the whole picture.
Conclusion
Make one chair study with three gaps and light lines. Choose the space that looks least like your subject, compare its corners and proportions, and change one boundary. Leave a small note about that correction. On the next drawing, check the same relationship early and see whether it helps you place the chair more accurately.
FAQ
Does negative space have to be white?
No. It may be dark, colored, patterned, or shaded. Its role comes from its relationship to the subject. In an exercise, a simple background makes the shapes easier to isolate. In a finished picture, their values and colors can contribute to the composition.
Can I practice from a photograph?
Yes. Keep the photograph at a fixed crop and compare the gaps within that frame. Use an image you own or have permission to use. A photograph removes viewpoint changes, which can make it easier to concentrate on shape comparison during an early practice session.